

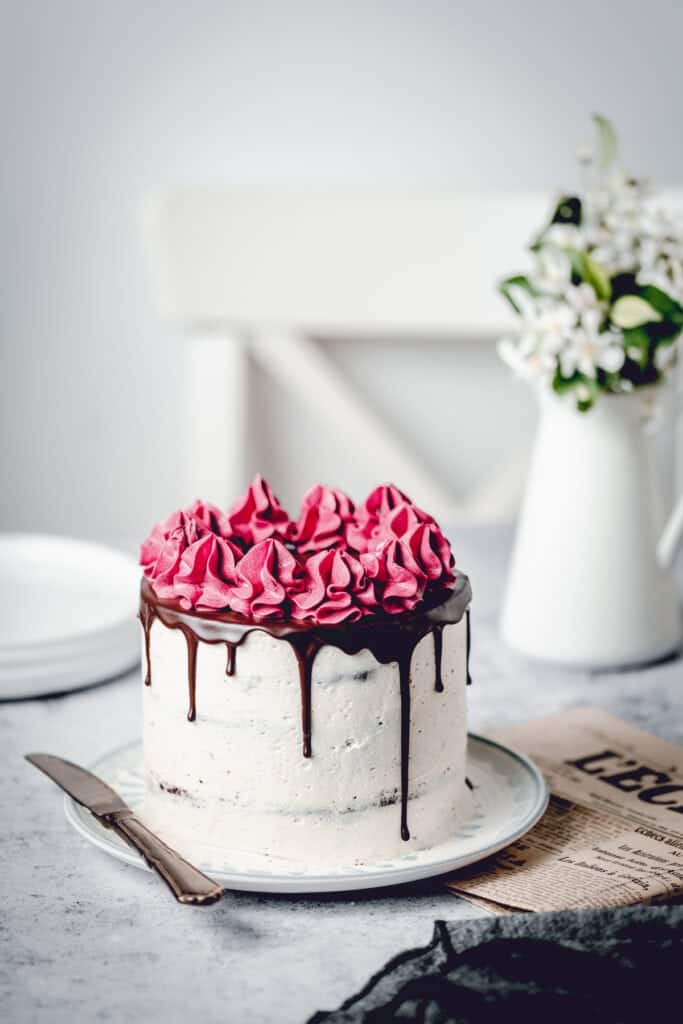
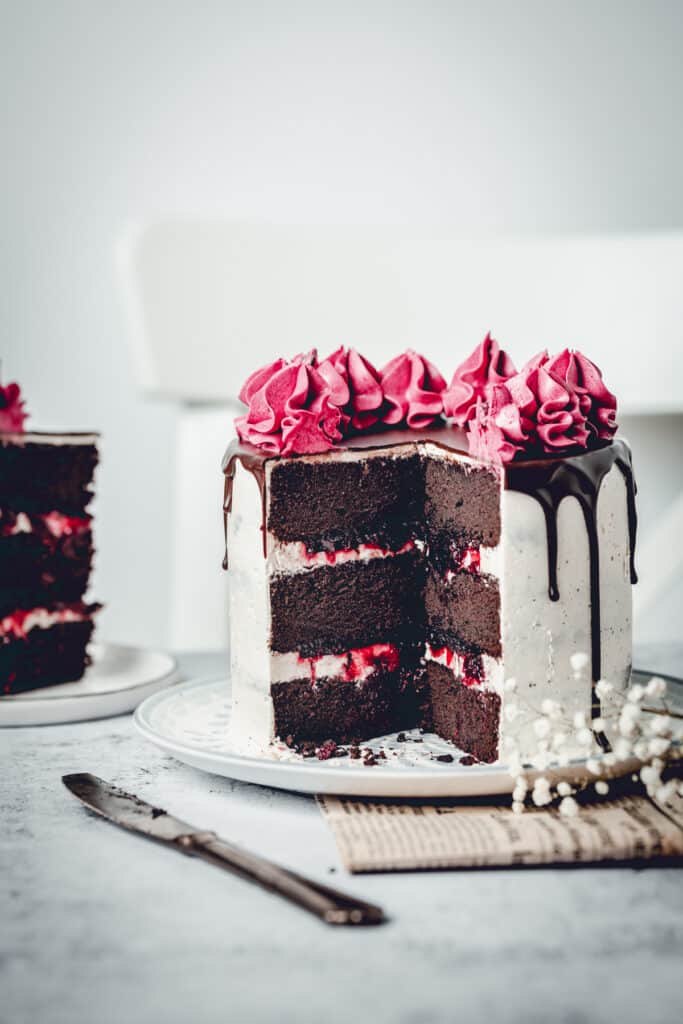
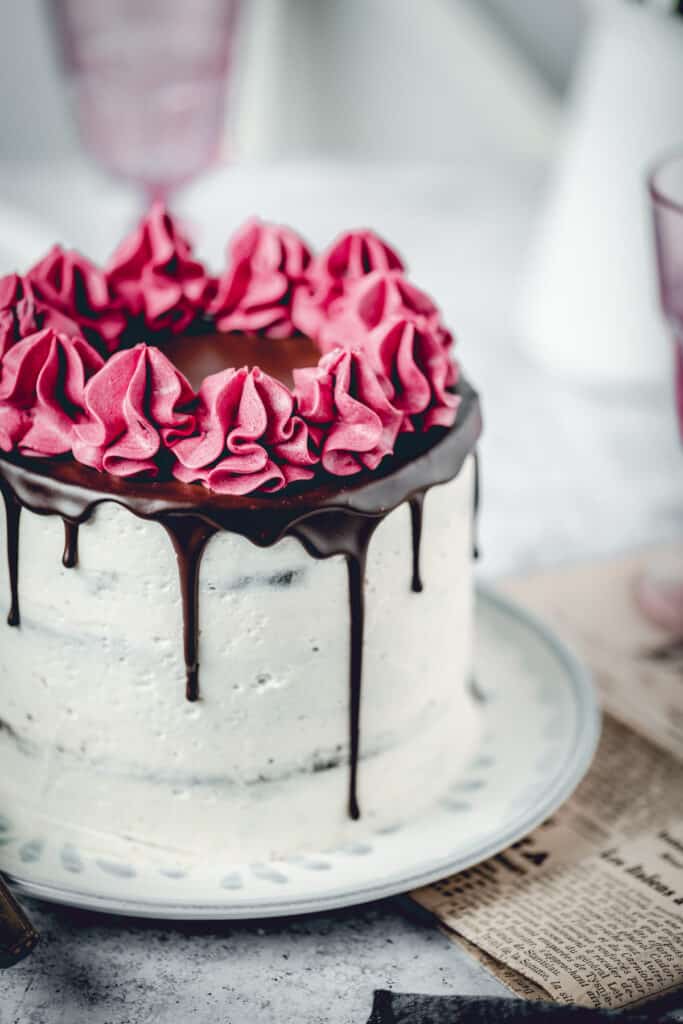
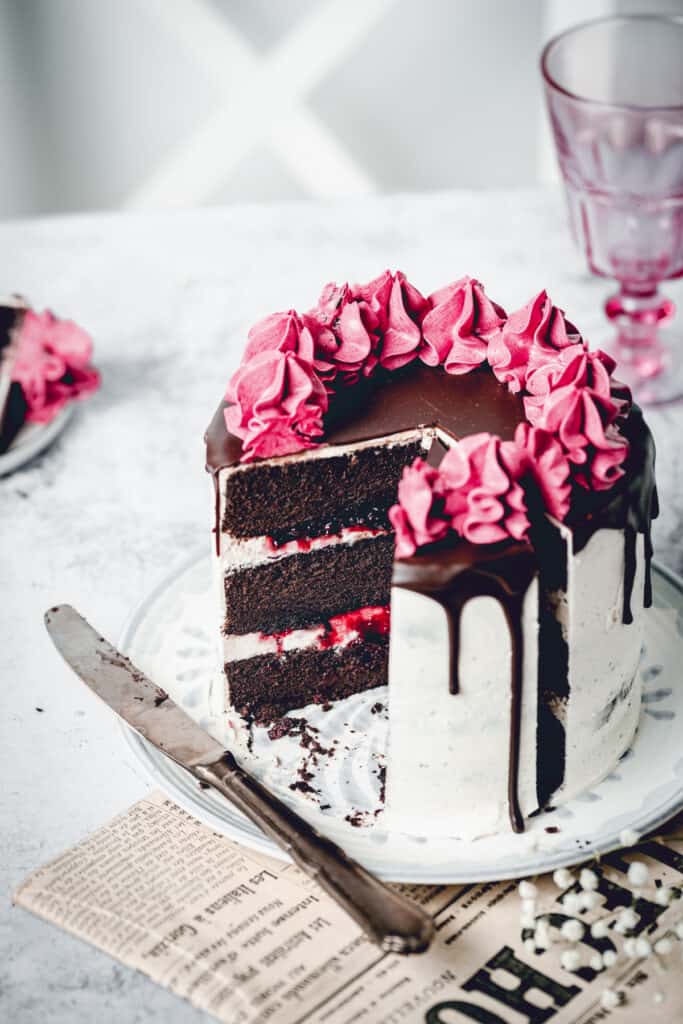
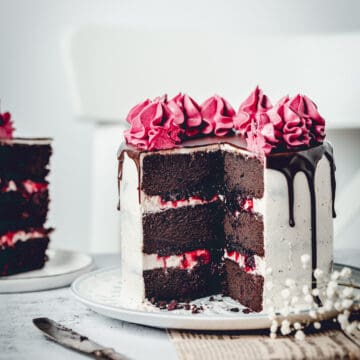
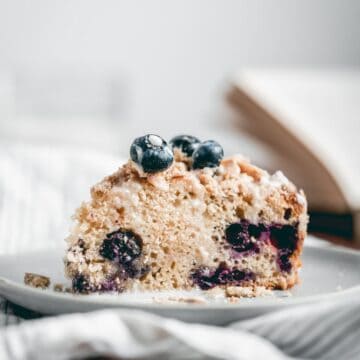
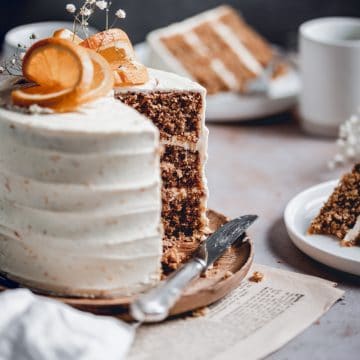
This Cherry Chocolate Cake is made of fudgy and moist chocolate cake layers filled with sour cherry filling and silky vanilla buttercream. Pure heaven!
I really love chocolate. Some may say I'm a chocoholic. But I'm not sure that I love everything chocolate flavoured. I know, shocking.
When those nasty sugar cravings come along, semi-sweet chocolate is my go to choice in calming them down. In restaurants I often choose some chocolatey dessert (I play safe) but the truth is... none of them can compare to the taste of a perfect chocolate bar. Except maybe brownies. I'm a sucker for those. That is probably one of the best chocolate things I've ever eaten and they were on my mind when I tinkered around with this recipe. I guess I'm just one of those people that likes fudgy and dense chocolate cakes more than fluffy and airy ones. *sorry - not sorry*
Fudgey chocolate cake layers
I decided to experiment with melted chocolate in the cake batter because I wanted to make it fudgey, more like a brownie. And it worked! I also used butter instead of vegetable oil, which is usually used in chocolate cakes, because... it's butter. Food that makes other food more delicious, am I right? 😉 But it also provides more fudginess, just like in a brownie, instead of oil which is used when you want fluffier texture.
Since this cake is on a denser side, it may not rise as much and it get slightly crackly on top, kind of like brownie. Let that not concern you. 🙂
I usually bake my cakes in sandwich tins which are 1.5" high. So, if you want a taller cake, you should make an extra layer. 🙂
Cherry pie filling
I made the cherry pie filling using frozen sour cherries because they weren't in season at the time. Additionally, I think you could pull it off with just putting some fresh delicious cherries on top of a vanilla buttercream layer. There is nothing better than using seasoned fruits, do you agree? Just make sure to make a dam of buttercream around each cake layer to keep those cherries inside.
Just like in a cherry pie, I used some cornstarch as a thickener and aim for a looser structure.
And as far as buttercream is concerned, this is my go to vanilla buttercream! It's not too sweet or too buttery and it has a beautiful, silky texture. I'll be making a separate post dedicated just to this gorgeous frosting, soon!
For more chocolate desserts, check out these:
Cookie Butter Swirl Brownie
Chewy Oatmeal Chocolate Chip Cookies
Chocolate Berry Layer Cake
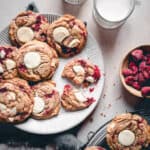
White Chocolate Chunk Chocolate Cookies
If you make this gorgeous Cherry Chocolate Brownie Cake let me know by tagging me on Instagram @anasbakingchronicles or tell me all about it in the comments section down below. Seeing my recipes come to life in your kitchens, always makes me incredibly happy! If you have any questions, don’t hesitate to ask. Happy baking!
Love,

📖 Recipe
Cherry Chocolate Brownie Cake
Description
ingredients
Chocolate Cake
- 2 large eggs (room temperature)
- 180 g unsalted butter (room temperature)
- 80 g light muscovado sugar
- 140 g caster sugar
- 150 g all-purpose flour (sifted)
- 45 g Dutch-processed cocoa powder (sifted)
- 1 + ½ teaspoon baking powder
- ½ teaspoon salt
- 80 g good quality dark chocolate (melted)
- 90 g hot water
- 120 g sour cream (room temperature)
- 1 + ½ teaspoon vanilla extract
Cherry filling
- 200 g frozen sour cherries
- 80 g granulated sugar
- 3 teaspoons corn starch
- 1 tablespoon water
Vanilla Buttercream
- 35 g all purpose flour
- 150 g granulated sugar
- 280 g whole milk
- ¼ teaspoon salt
- 250 g unsalted butter (room temperature)
- 2 teaspoon vanilla extract
Chocolate Ganache Drip
- 75 g semi sweet chocolate
- 100 g heavy cream
Instructions
Chocolate Brownie Cake
- Preheat your fan oven to 165°C (320°F). Grease and line with parchment paper three 6 inch ( 15 cm) round cake tins.
- In a medium bowl mix sifted cocoa powder with hot water. Whisk until combined and smooth. Leave it aside to cool to room temperature.
- Whisk together sifted flour, baking powder and salt. Set aside. Add sour cream, melted chocolate and vanilla extract to cocoa mixture. Whisk together until combined. These are your wet ingredients.
- Using a stand mixer fitted with a paddle attachment, cream butter and sugar on medium-high until pale and fluffy - approximately 3 minutes. Stop the mixer and scrape down the bowl. Turn the mixer to medium-low speed and add eggs one at a time - making sure it's fully incorporated after each addition. Stop the mixer and scrape down the bowl.
- Add your dry and wet ingredients, alternating between one another, starting and finishing with dry ones. (3 additions of dry and 2 of wet ingredients)
- Divide the batter evenly among the 3 tins and bake for 25 minutes or until skewer inserted in the middle comes out mostly clean.
- Once they're done, let the cakes cool for 10-15 minutes on a wire rack before removing them from the pans to cool completely.
Cherry Filling
- In a small saucepan combine frozen cherries and sugar and bring to boil over medium heat. Simmer for a few minutes.
- Dilute the corn starch with water and pour over the cherries mixing constantly with a large wooden spoon until everything is incorporated.
- Bring the mixture to a boil and cook for a few minutes. If the filling is too thick you can add some more water. That depends on the water content of frozen cherries.
- Once thickened, transfer it to a bowl and cover with cling film touching the surface to prevent "skin" forming.
- You can put it in the fridge to cool completely.
Vanilla Buttercream
- Put the flour, sugar, salt and milk into a small heavy bottomed saucepan and combine using a whisk.Cook over medium to high heat, whisking continuously, so it doesn't burn or catch in the bottom. Once it starts to get thicker and you notice bubbling, cook for another 2 minutes, still whisking continuously, until it resembles pastry cream. This could take about 10 minutes.
- When the pudding base is done, strain it through a sieve into a shallow plate, to get rid of any possible lumps. Cover it with plastic wrap touching the surface to prevent«skin» forming and let it cool to room temperature. You can speed up the process by letting it cool in the fridge, but prior to using it it must be room temperature.
- Using a stand mixer fitted with the paddle attachment, beat the butter for 5 minutes, until it's pale and fluffy. Then, add spoonful by spoonful of previously made pudding base. Beat everything until it's all nicely incorporated and with no lumps. Add vanilla extract and mix for another 30 seconds.
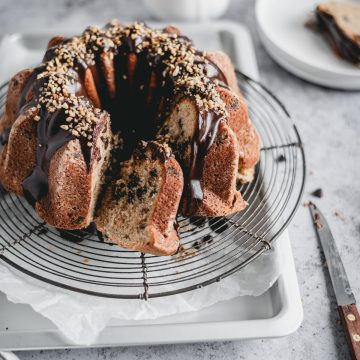
Chocolate Ganache Drip
- Place finely chopped chocolate in a bowl. Bring heavy cream just barely to a simmer and pour over chopped chocolate. Cover it with a plate and leave it 1-2 minutes. Stir with a spatula until combined and smooth. Make it 10 minutes before pouring over the chilled cake so it has time to cool and thicken a bit.
Assembly
- Using a cake leveler or a long serrated knife level the tops of your cakes if needed.
- In the middle of your cake board or a serving plate put some buttercream to keep the cake from moving.
- Spread a thin layer of buttercream on top of the layer and pipe a border around the outside to hold the cherry filling in. Repeat with the next layer.
- Place final layer on top and do a thin crumb coat on the cake. Chill for 20-30 minutes in the fridge before final decorating.
- Frost the top and sides of the cake with remaining frosting.
- Chill the cake for an hour before putting the chocolate drip on top. It has to be cold so the drip doesn't go all the way down.
Notes
- If you don't have a standing mixer you can use a hand mixer.
- Not all ovens are the same. I suggest to check the cakes at 20 min mark and then adjust the baking time accordingly. Get to know your oven! 🙂
- If you still don't own one, I advise you to buy a kitchen scale - they're cheap and easy to use, and always guarantee the same results in baking!

- Cake is best eaten at room temperature. You can keep it in a fridge, wrapped in cling film, but take it out of it at least half an hour before serving.

IMPORTANT
All the recipes are developed and tested using only metric measurements and a kitchen scale. The U.S. cup and spoon measurements are provided for your convenience, but I highly recommend getting a digital kitchen scale and measuring in metrics. It's easy and always guarantee the same results in baking!
Nutrition
The nutritional information and US conversions are calculated automatically. I cannot guarantee the accuracy of this data. If this is important to you, please verify with your favourite nutrition calculator and/or unit conversion tool.
Vivian says
Hi Ana! I absolutely LOVED how you made this cake so
pretty and scrumptious at the same time! I was just wondering which piping tip you used on the top? All my love from Australia! x
Ana Zelić says
Hi, Vivian,
Thank you SO much! 🙂 I used Wilton 1M, held the piping bag perpendicular to the cake and just squeezed it, without making swirl motions - it's really easy. You can practice on baking paper and then scrape it to the bowl to reuse 🙂
Good luck x
Ginger Hackney says
Excited to try this recipe. Question - how did you tint the frosting on top of the cake? Color is awesome!
Ana Zelić says
Hi, Ginger! Hope you'll like it as much as we do at home 🙂
I think I used Wilton gel food color in Burgundy shade, but mixing red with a little bit of purple could also give a similar shade.
Heidi says
Thank you Anna for this great recipe! I made this for my daughter’s birthday and she loved it. I appreciate how detailed your directions are to follow, especially because I need a lot of help as a beginning cake maker. I will be perusing your other recipes as this was a hit with the family! Thanks again 🙂
Ana Zelić says
Hi Heidi!
Oh, that makes me so happy! Happy birthday to your daughter and thanks for trusting me with the recipe! 🙂
Ana x
Dajana says
Jednostavna a efektna torta, mi smo ju radili za rodjendan. Meni uvijek odlicna kombinacija cokolade i visanja🤩
Radila sam ju u kalupu promjera 18cm jer nisam nasla 15. Ispala je super!
Preporucam ! 🙂
Scott says
This cake looks amazing and a great way to use some of this years tart cherries.
Quick question - would black cocoa work or would that be too bitter?
Will let you know how it turns out.
Ana Zelić says
Hi Scott!
I've never had the chance to try black cocoa, so I can't help you, unfortunately. If you do end up using it, I'd appreciate it if you'd share how everything went. Good luck! :))
laura says
excellent recipe, will add more cherries to the filling next time
jillian says
hello,
this recipe looks lovely. my 4yo has requested a cherry chocolate cake for his birthday and i’m looking for one that i could carve into a car-ramp cake. other recipes i’ve looked might look too soft and crumbly to carve. i’m wondering if this denser cake would be carvable. thank you for any advice!
Ana Zelić says
Hi Jillian,
this is like a crossover between a cake and a brownie, but I'm not sure if it's good for carving. Even though it's dense, it's still kind of delicate. Just like a brownie has a crackly top, this cake has a crumbly/crackly top as well. I usually remove it to even out the layers and remove the crumbs.
I've never done any cake carving, so I don't want to steer you in the wrong direction in any way. If you have the time and resources, you can maybe make 1 6-inch layer and test it?
Either way, good luck with your quest to find a perfect cake for carving 🙂
jillian says
thank you so much for the feedback. and thank you for the delicious and detailed recipe!
Karissa says
Could this cake be made larger? My tins are 9 inches
Ana Zelić says
Hi Karissa, you can, but you need to adjust the ingredients, otherwise you'll end up with wafer-thin cake layers. I would most certainly double the recipe, you might have slightly less tall layers than in 6 inch cake, but tripling the ingredients would make too much batter.
Hope this helps x