


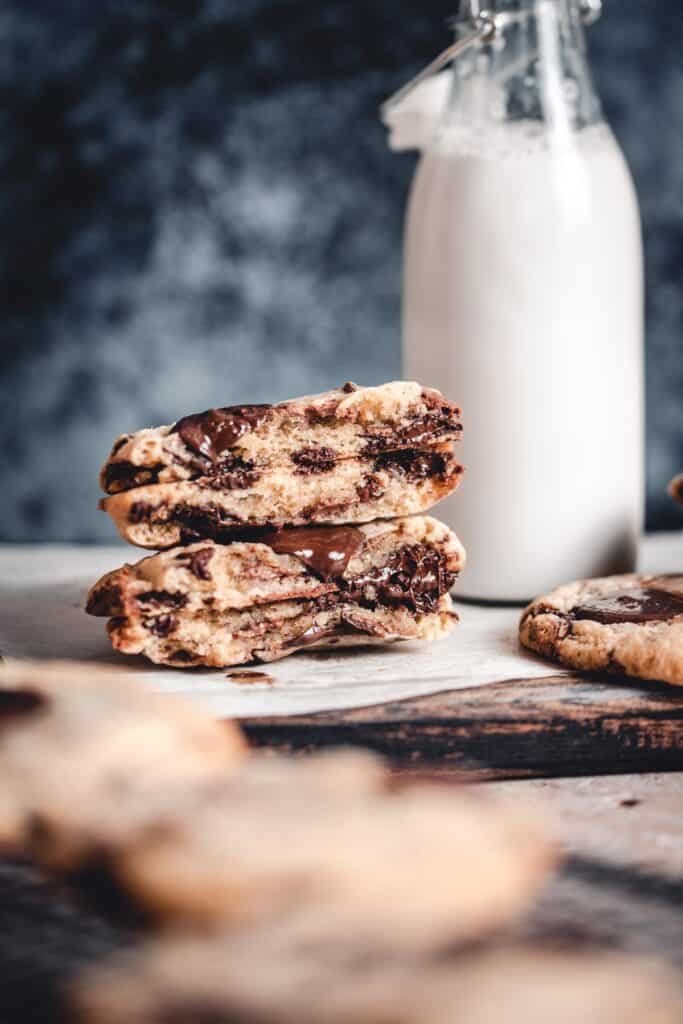
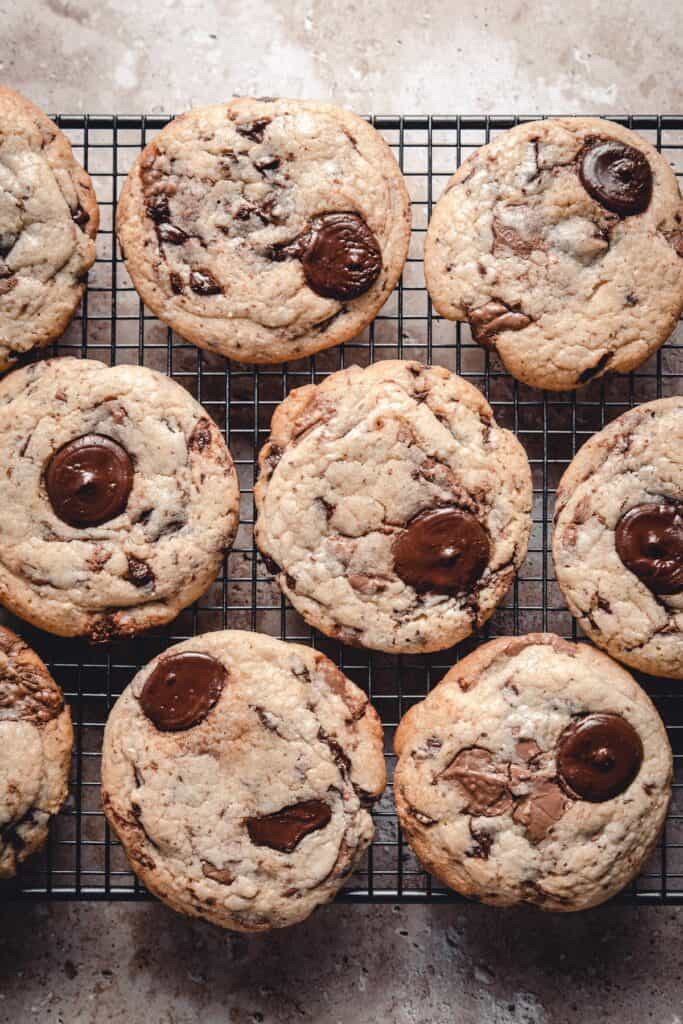
With that gooey, soft center, crispy buttery edges and mixed chocolate chunks, these Chocolate Chip Cookies without Brown Sugar absolutely deliver, both in terms of flavor and texture. And you only need your pantry staples!
Don't get me wrong, I love going the extra mile when making chocolate chip cookies with browning the butter, using muscovado sugar and all that goodness. If you're into getting the best of the best, then check out my Brown Butter Chocolate Chip Cookies recipe.
But I also understand the need to get a perfectly satisfying, great cookie, as quickly as possible, with just a handful of your staple pantry ingredients. Cue these No Brown Sugar Chocolate Chip Cookies, that will become your favorite go-to chocolate chip cookie recipe whether you're in a hurry or not!
Jump to:
You'll love this recipe because:
- it's super easy
- can be made using a hand whisk
- you only need pantry staples + chocolate
- it's chewy, soft and delicious
- and of course - there's no brown sugar!
Ingredients
This recipe is your dream come true because it requires just normal, everyday ingredients, that any passionate baker—like yourself— has in their pantry 🙂
You'll need:
- unsalted butter
- eggs
- granulated or caster sugar
- vanilla extract
- fine sea salt
- all-purpose flour
- baking soda
- chocolate
Want to go the extra mile? I highly recommend browning the butter. It will provide a more complex and deeper flavor to your cookies. Check the instructions here.
How to make chocolate chip cookies without brown sugar (step-by-step)
It's such an easy process, that you'll be making these chocolate chip cookies all the time!
Remember: You have the fully written recipe with detailed instructions at the end of the post, but I advise you to read all the tips and FAQs before making this recipe!
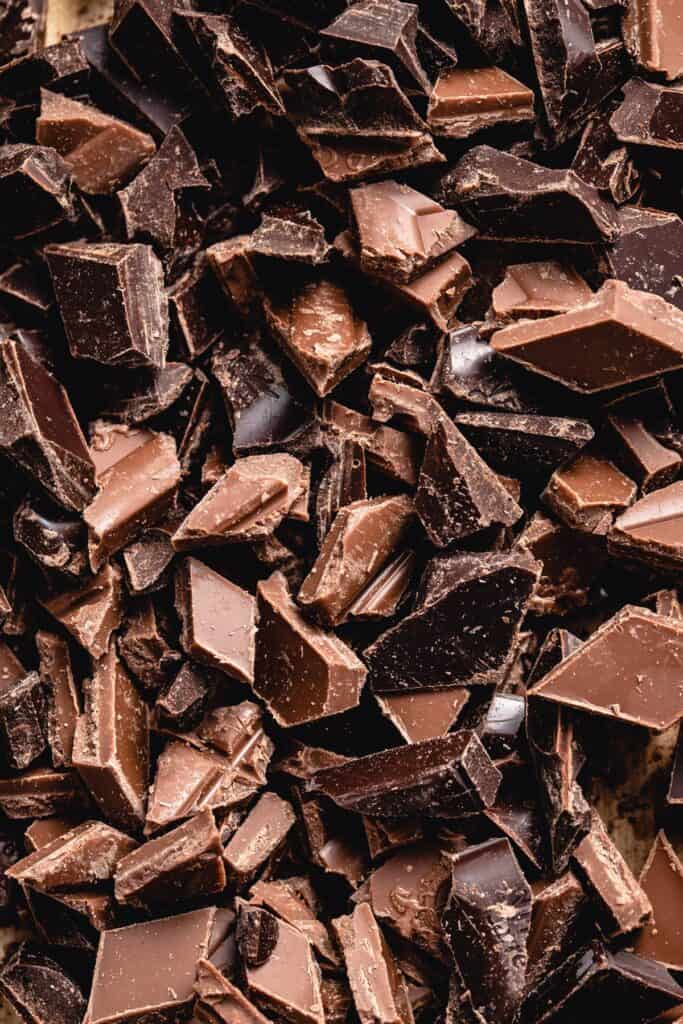
- Start by chopping the chocolate. I used both the dark and milk chocolate, but you use whichever you prefer!
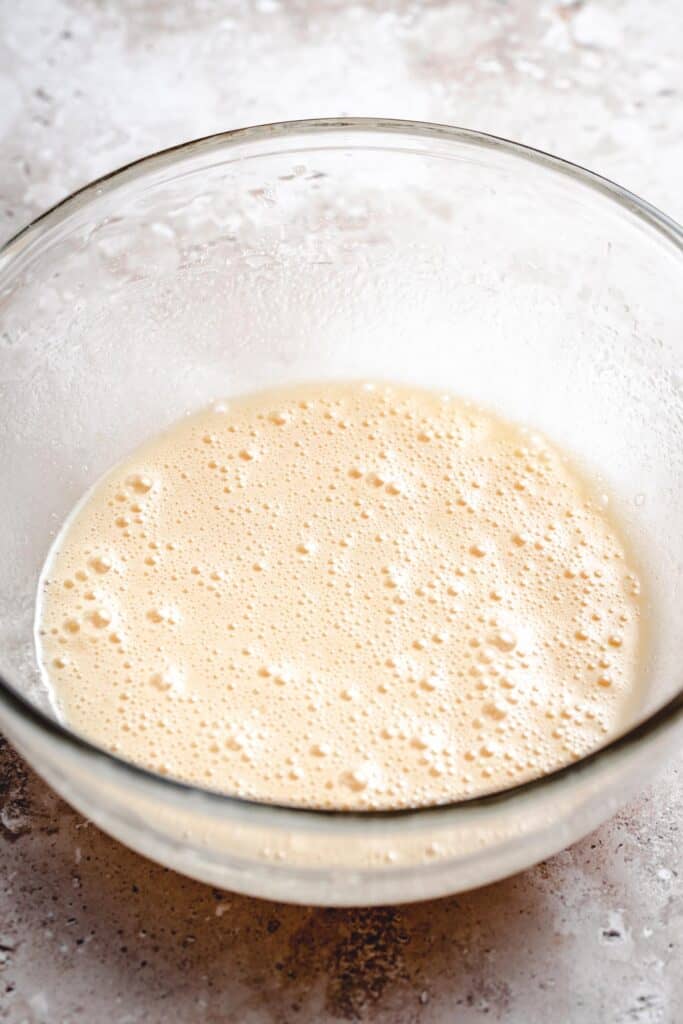
- Combine the cooled melted butter, sugar, vanilla extract, egg and an egg yolk using a whisk or an electric hand mixer, until thoroughly incorporated.

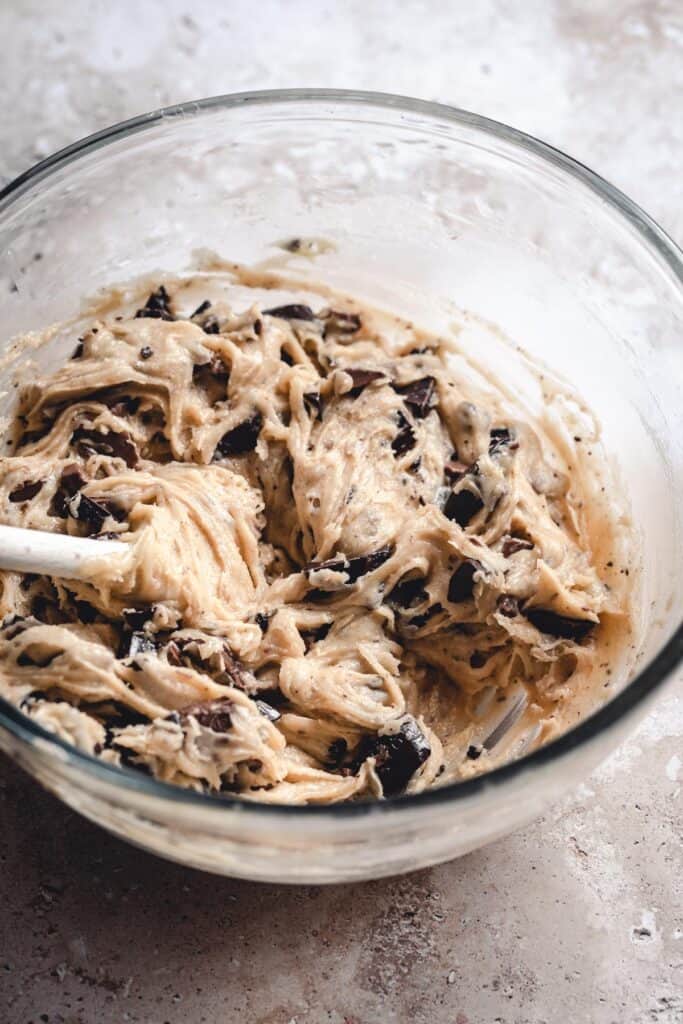
3. Add the dry ingredients (flour, baking soda, salt) to the butter mixture, using a wooden spoon or a silicone spatula. Mix until there are no traces of flour visible.
4. Lastly, add in the chopped chocolate and give it a stir with a wooden spoon.
Ideally, you want the dough to rest in the fridge for about 30 minutes.
Don't feel like chilling the dough? That's okay! You can bake them straight away, they will just be slightly thinner! However, if you like a thicker cookie, I would still suggest letting the dough rest for at least 15 minutes, so the flour can have the time to absorb some of the moisture. That way your dough won't be as sticky and it won't over-spread in the oven.
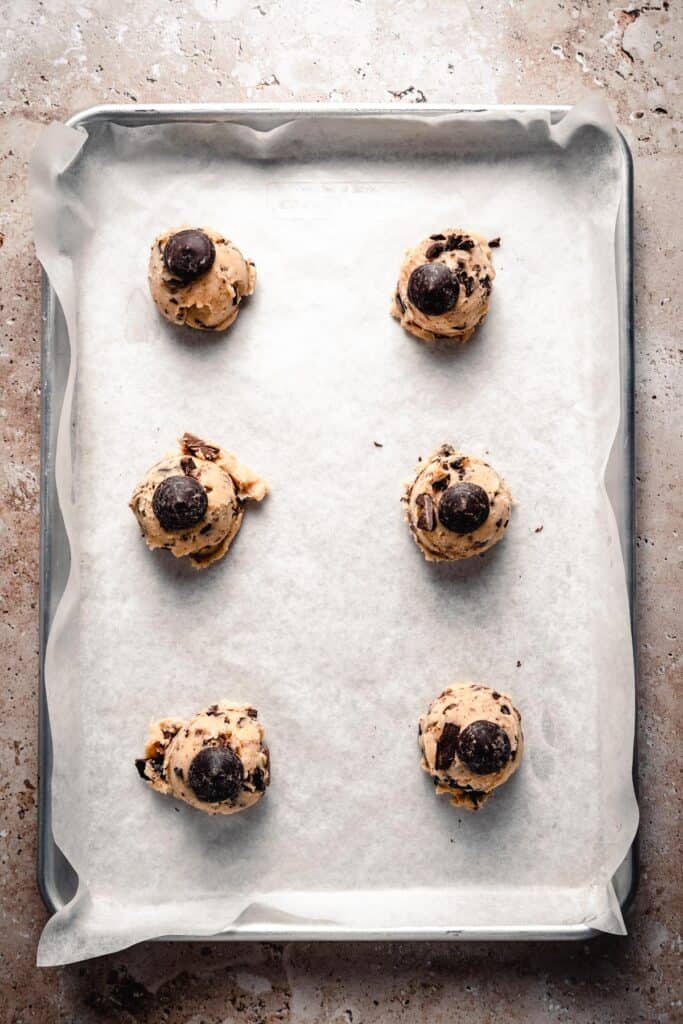

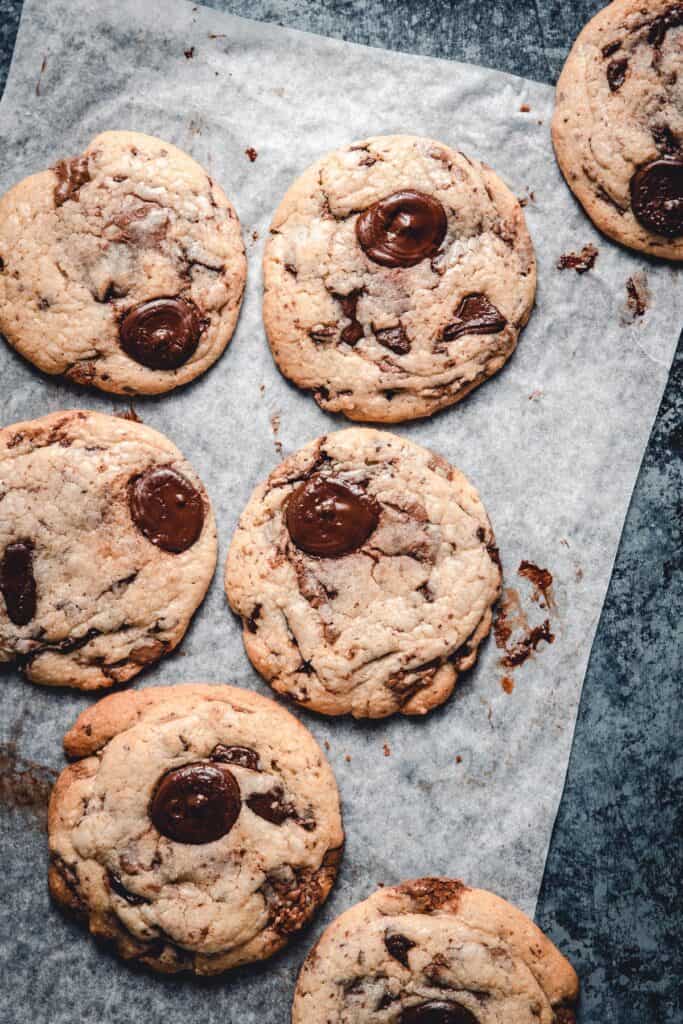
5. Then, scoop the dough on the baking sheet, spacing the balls 3-inch (7-cm) apart. If desired, top the dough with some extra chocolate, to get the shiny, melted chocolate on top.
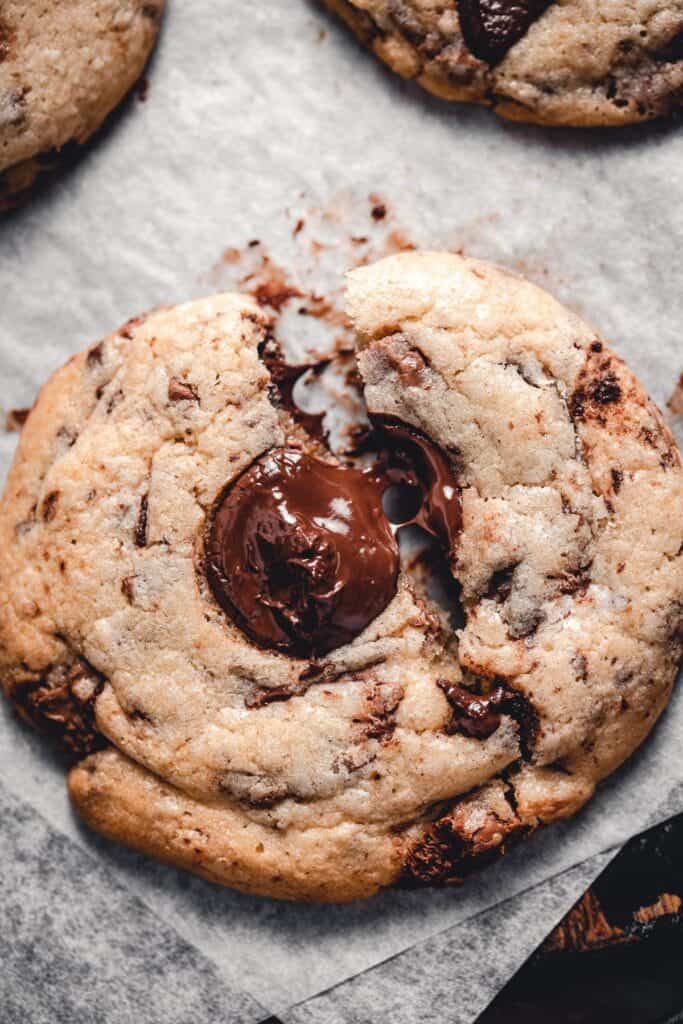
6. Bake for 9-10 minutes, until the edges are slightly golden and the middle is still very soft.
Once they're done, take the tray out of the oven and leave the cookies on it for 2 minutes, so they can firm up a little bit.
Then transfer the cookies on a wire rack to cool completely.
💡My top tips for success
- Let the dough rest. Half an hour is fine; enough for the flour to absorb the moisture and create a more compact dough. However, you're welcome to let the dough rest in the fridge for 2 days. The longer it sits, the deeper the cookie flavor will be.
- Choose good quality ingredients. The better the ingredients, the better the result. Go for european-style butter with min. 82% fat and choose the chocolate that taste the best to YOU. That defines the taste of the cookie.
- Don't overbake the cookies. I believe this is a step that most people get wrong if they're not happy with the recipe. You want the middle to be very soft, almost like it's underbaked and a little bit puffed up. The edges will be barely golden, but crispier than the middle. The reason we do this is because the heat from the pan will continue to bake the cookies even when you take them out of the oven.
- Bang the pan on the counter. For that perfect chocolate chip cookie texture and look, try banging the pan a couple of times once the cookies are done. The puffed up middle should deflate and you should get those nice ridges and wrinkly look. Thank you Sarah Kieffer for this method!
- Bake a test cookie. It's the best way to see how long you need to bake the cookies and at what temperature, because ovens vary and have their perks. (cough*flaws*cough) Leave it to cool and firm up a little bit before you taste it. Then, adjust the baking time or the oven temperature to get a perfectly soft, gooey cookie.
- Use a large, round cookie cutter to fix the shape of the cookies by going around them while fresh from the oven. This is a tip I've picked up from the amazing Erin, from Cloudy Kitchen. It's golden! Alternatively, you can use a spoon and tuck the loose sides back in.
- Top the cookies with extra chocolate to get those nice, shiny, pools of chocolate. I used Belcolade dark chocolate discs, but you can use chunks of your favorite chocolate.
Storing and freezing
Keep the cookies in an airtight container at room temperature for 3-5 days.
FAQs and troubleshooting
Yes, absolutely! It's best to portion the dough with an ice cream scoop, place it on a baking tray and put it in the freezer like that, on the tray, for about an hour. Then collect the frozen cookie dough balls and place them in the freezer bag. Doing it this way prevents the dough to stick to itself and you can easily grab as many or as little as you want.
You can bake the frozen cookie dough, but lower the temperature for 20 degrees C and add a couple of minutes.
Yes! Let them come to room temperature, then double wrap them with cling film individually, before placing them in a bag. This way it's easier to defrost one at a time.
For defrosting, leave the cookie at the counter, still wrapped, until it comes to room temperature. You can also use a microwave if you have one!
They will keep good for 5 days, stored in an airtight container at room temperature. The longer it sits, the drier it will get.
You can, but you need to account for the baking time. Smaller cookies will need less time in the oven; it's easier to overbake them. If you're making half the size, I would turn down the temperature for 20 degrees Celsius and keep an eye on them.
If you have any other questions that I didn't cover, please let me know in the comments section down below - I'd love to help you out! And if you make this recipe, tag me on Instagram @anasbakingchronicles so I can see it or feel free to e-mail me your pictures and thoughts! I love seeing your bakes!
Happy baking,
Ana
📖 Recipe

Chocolate Chip Cookies without Brown Sugar
Description
ingredients
- 140 g unsalted butter
- 1 large egg (room temperature)
- 1 large egg yolk
- 1 teaspoon vanilla extract
- 175 g granulated sugar
- ¾ teaspoon fine sea salt
- 200 g all-purpose flour
- ½ teaspoon baking soda
- 100 g dark chocolate
- 75 g milk chocolate
- extra chocolate for topping
Instructions
- Cut the butter into cubes, place into a small saucepan and heat until just melted. Transfer the melted butter into the mixing bowl and let it cool, until lukewarm or room temperature.
- While your butter is cooling, sift together flour, baking soda and salt, and set aside.
- Chop the dark and milk chocolate into different-sized chunks.
- Add the sugar, egg, egg yolk and vanilla extract to the butter. Combine together using a whisk or an electric hand mixer.
- Add the dry ingredients to wet ingredients and fold everything together using a silicone spatula or a wooden spoon.
- Lastly, fold in the chopped chocolate.
- Let the dough rest for 15-30 minutes, so the flour has time to absorb the moisture, which will prevent your cookies from spreading too much.
- Preheat the oven to 180°C (350°F) or 160°C (320°F) if you're using a fan oven. Line a baking sheet with parchment paper.
- Using an ice cream or a cookie scoop that has a 5-cm diameter, scoop out the cookie dough onto the prepared sheet by leaving a 3-inch (7-cm) gap between each. (Each cookie dough ball weighs between 70 to 80 grams)
- Bake for 9-10 minutes.*
- The cookies are done when they are slightly golden around the edges, but very soft and puffy in the middle; like they need another minute or two. But that's exactly what you want for a soft and chewy inside!
- Take out the baking sheet and give it a couple of bangs on the counter, to create the signature wrinkly chocolate chip look.**
- Leave the cookies on the tray for 2 minutes before transferring them to a wire rack to cool completely.
- Keep the baked cookies in an airtight container, at room temperature for 3-5 days.
Notes
- I advise you to bake a "test" cookie to estimate the best baking time and oven temperature (depending on the size of your cookies), so you don't end up with less than perfect cookies.*
- The credit for the pan-banging method goes to Sarah Kieffer, from The Vanilla Bean Blog.**
IMPORTANT
All the recipes are developed and tested using only metric measurements and a kitchen scale. The U.S. cup and spoon measurements are provided for your convenience, but I highly recommend getting a digital kitchen scale and measuring in metrics. It's easy and always guarantee the same results in baking!
Nutrition
The nutritional information and US conversions are calculated automatically. I cannot guarantee the accuracy of this data. If this is important to you, please verify with your favourite nutrition calculator and/or unit conversion tool.


Comments
No Comments