


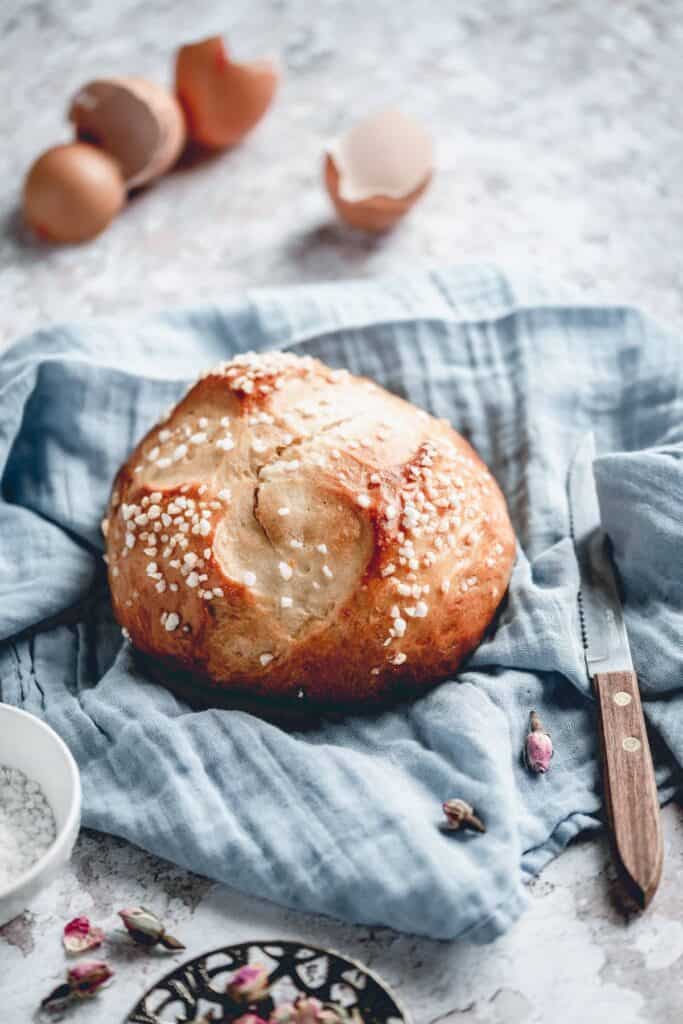
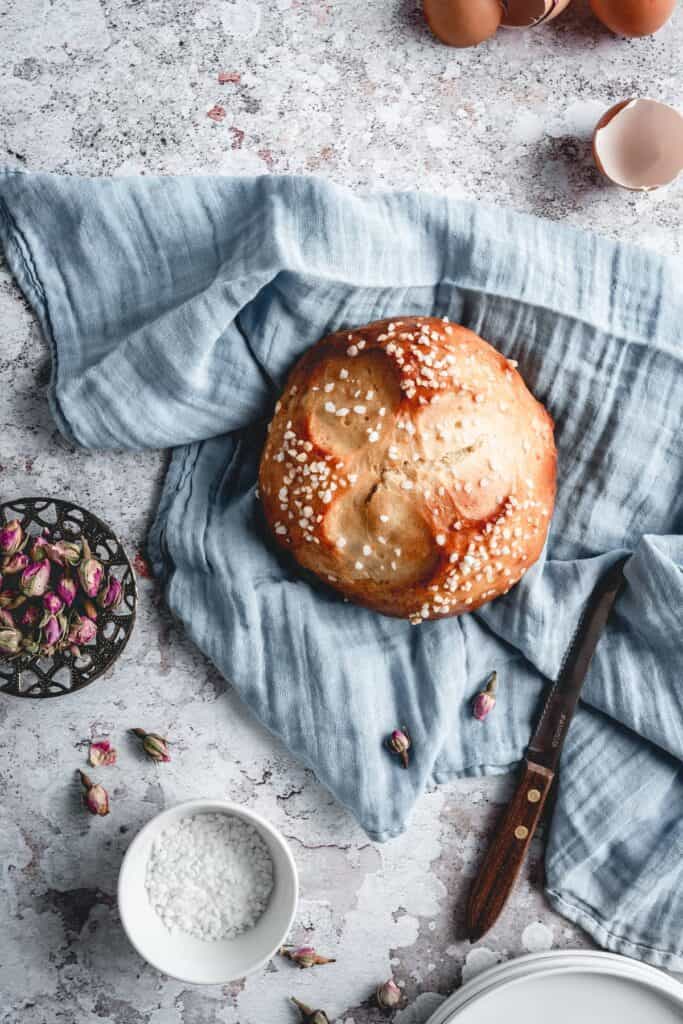
Amazingly aromatic, flavoured with different citrus zests and rose liqueur, this sweet croatian Easter bread called Pinca is our favourite Easter snack. Perfectly fluffy and soft, it stays fresh even after a couple of days!
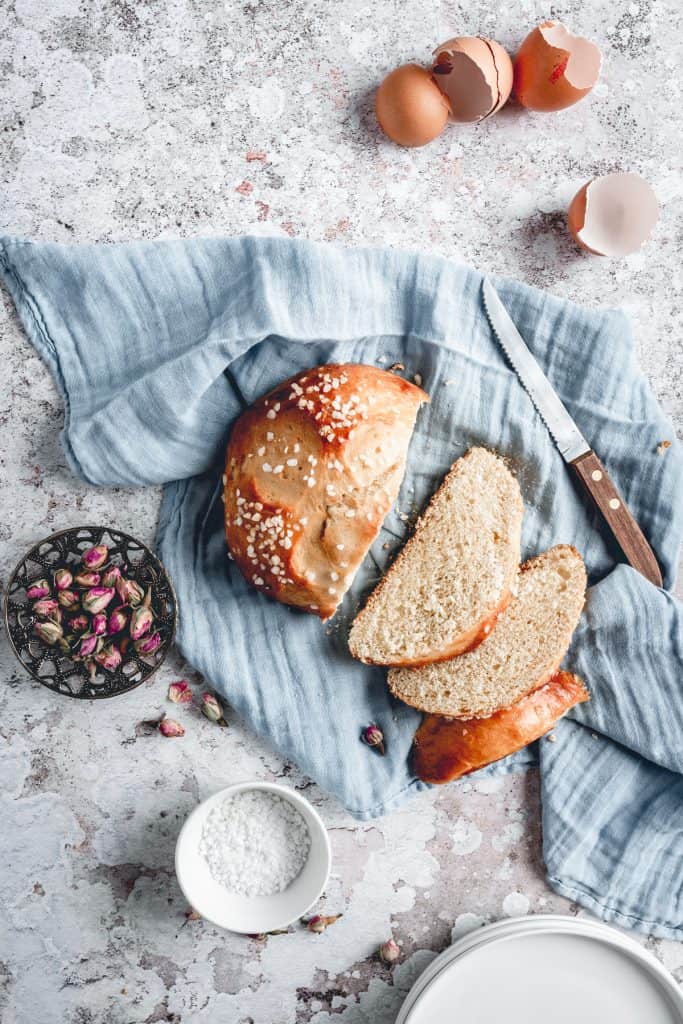
Pronounced peen-tzah (I really hope I did this right), this aromatic sweet bread is for many Croatians an epitome of Easter food, including me. Am I a bit late to the party writing this recipe just two days before Easter? Naahh, this one is good all-year-round. In fact, at home we're often asking ourselves why the heck we don't make pinca more often? I mean, really?
Some people also call it sirnica (I'm not even going to try to write pronunciation for this one, because it seems too hard), like my family from my dad's side. I don't care what's right, as long as it's this delicious and amazing. 🙂
How to make sweet croatian Easter bread - Pinca
This is a yeast leavened, enriched dough. Now, don't run away just yet. I promise that working with yeast is not that challenging. It does takes some practice, but even the failed attempts still taste good. Especially if you like doughy things and you've tried raw dough as a child. (Guilty as charged, sorry grandma) But let me tell you a couple of things to help you out:
- Make sure your yeast hasn't expired. If working with active dry or fresh yeast, you need to activate it by covering in warm liquid and some sugar - the yeast feeds off sugar. Be careful when heating the milk though, if it's too hot it will kill the yeast which will result in no rise. Optimal temperature is between 45-50 degrees Celsius.
- If possible, use organic lemon and orange. That zest is so much stronger and flavourful. But if you can't find any, I understand. Use the best you got. 🙂
- My hometown Dubrovnik is famous for its homemade rose liqueurs - Rozulin. So if I have any homemade on hand, I'll most definitely use it. Instead of it, you can use rose extract. I don't recommend aromas, because they can taste soapy.
- I used mix of brown and white sugar for extra flavour, and for my wet ingredients I combined sour cream and milk - to make the softest dough possible with prolonged freshness.
- Traditionally, some people say that it's best to mix three types of fat - butter, oil and lard. I don't have any lard, I'm not used to using it in cooking, so I've used oil and butter. Oil keeps the dough moist.
- The easiest way to make our sweet easter bread is by using a stand mixer. But since I know it's not easily accessible to everyone, fret not - you can use an electric hand mixer, too. Just make sure you have the right attachments. Aside from that, there's always the old school method - using a wooden spoon and your muscles. 😉
I've stated in the recipe that it serves 15 people, but if you're anything like me, you'll eat one all by yourself, for breakfast AND dessert. Lol. Yup, it's THAT good.
TIP for dough proofing
Since the dough needs to prove (rise), it's best to do that in a warm environment, because what makes it rise is yeast. But, if it's cold or you want to speed up the process, then use a warm oven! Honestly, that's what I do in 99% of the time. I preheat the oven to 50C, turn it off and leave for a minute and then put the dough in there to prove. Works like a charm every time!
If you make this sweet Easter bread I'll be so honoured. Please, let me know how it went by tagging me on Instagram @anasbakingchronicles or tell me all about it in the comments section down below. I love seeing your creations! If you have any questions, don’t hesitate to ask. Happy baking!
Love,

📖 Recipe

Pinca - croatian easter bread
Description
ingredients
- 600 g all-purpose flour
- ½ teaspoon fine sea salt
- 80 g brown cane sugar
- 60 g white caster sugar
- 1 + ½ envelope instant or active dry yeast (or 40 g fresh yeast)
- 125 g whole milk
- 125 g sour cream (room temperature)
- 80 g sunflower oil
- 60 g unsalted butter (softened)
- 3 large egg yolks (room temperature)
- 1 large egg (room temperature)
- 1 teaspoon rosewater extract
- 1 tablespoon rum (optional)
- zest of one or two large oranges
- zest of one or two large lemons
- 1 large egg (for brushing)
- pearl sugar
Instructions
- In a bowl of a stand mixer sift together flour, salt and sugars. Set aside while you prepare the rest.
- If you're using active dry yeast, you need to activate it first. Heat your milk over a medium heat until it reaches about 45-50°C. Place active dry yeast in a small bowl, with a teaspoon of sugar and cover with half of warm milk. Mix it with a teaspoon and leave it to rest for 5 minutes or until it becomes all frothy and bubbly on top.
- While your yeast is activating, prepare the rest. Melt the butter and let it cool a little bit. Combine leftover warm milk and sour cream in a jug, add rosewater and rum and mix until combined. Mix egg yolks with egg a little bit using a fork or a mini whisk.
- Once you got everything ready, pour your yeast, milk/sour cream mixture and fats (butter and oil) to the flour. Add eggs. Zest lemon and orange straight into the bowl. Using your stand mixer fitted with the dough hook, knead it on low speed for about 10 minutes or until it starts pulling from the sides. You may want to turn the mixer down once or twice and scrape the bottom with a spatula to make sure everything combines well.
- The dough should be a little sticky, that's fine. When you're done with the stand mixer, transfer the dough to a lightly floured surface and knead it for just a couple of minutes, and form it into a ball. Transfer the dough to a greased bowl, cover with cling film or a clean tea towel and let it rise in a warm place, until doubled in size. This could take anywhere from 2 to 3 hours. You'll know the dough is perfectly risen if it leaves a small indent when you press your finger.
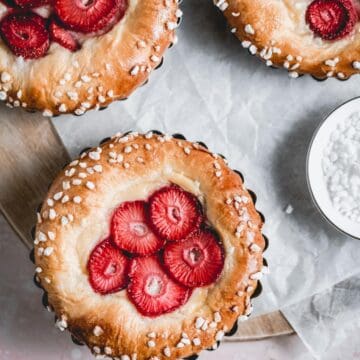
- Punch the dough with your hand, transfer it on a lightly floured surface and divide into 2 or 4.
- Knead to form balls of dough and place them on a baking tray covered with parchment paper (I use two trays for 4), leaving quite a space between them because they will rise. Cover with a clean tea towel and let them rest for another 1 to 2 hours in a warm place.
- Preheat your fan oven to 160˚C (325˚F) or 175˚C (350˚F) if not using a fan oven.
- When your pincas have risen, brush them with beaten egg, make three cuts in the middle using scissors (almost like peace sign, or Mercedes Benz). Then sprinkle them with pearl sugar and bake for approx. 20-25 minutes or up to 35 for 2 pieces.
- They're done when golden outside and if you stick a skewer in the center it comes clean. Let them cool on a wire rack for 5-10 minutes and if you don't plan to eat them immediately, then double wrap them in cling film while still warm to keep them fresh and moist.
Notes
- If making two instead of four, bake for approx. 30 min.
- The same process of activating the yeast goes if you use fresh yeast, just rub it a little bit between your fingers into chunky crumbs.
- Not all ovens are the same. If you experience browning at the top and are afraid it's too much, put a baking paper sheet over it or cover in aluminium foil. Just be careful when pulling them out of the oven - aluminium foil gets really hot!
- They are best eaten the same day. I suggest keeping them in an airtight container if you wish to eat them the next day as well. If you don't have an airtight container, tightly wrapped cling film would also do the trick.
- If you still don’t own one, I advise you to buy a kitchen scale – they’re cheap and easy to use, and always guarantee the same results in baking! 🙂
- If you don't have a stand mixer, don't panic - use an electric hand mixer fitted with dough attachments or a wooden spoon and your hands (just like the old days). 😉
IMPORTANT
All the recipes are developed and tested using only metric measurements and a kitchen scale. The U.S. cup and spoon measurements are provided for your convenience, but I highly recommend getting a digital kitchen scale and measuring in metrics. It's easy and always guarantee the same results in baking!
Nutrition
The nutritional information and US conversions are calculated automatically. I cannot guarantee the accuracy of this data. If this is important to you, please verify with your favourite nutrition calculator and/or unit conversion tool.


Julie says
I have a question...Can you prepare the dough the night before and bake them in the morning?
Ana Zelić says
Dear Julie, I apologize for my late reply as I was absent for some time due to finishing my cookbook. I've never made this in advance, so I couldn't tell you. I believe leaving the dough in the fridge to slowly rise overnight could do the trick, but this is a very rich dough, so I'm not sure. If you tried it let me know!