


You're searching for a light, easy-to-make, less sweet buttercream frosting that pipes beautifully AND tastes amazing? Then this is the recipe you've been waiting for!
This post has been updated from its original publish date of June 14th, 2020
Jump to:
What is ermine buttercream?
Also known as flour buttercream, boiled milk frosting and heritage frosting - this buttercream is made with a milk pudding base (milk, flour, sugar, salt) and unsalted butter. Since there are no eggs in this recipe, it's significantly easier and cheaper to make than meringue-based recipes. Not to mention the better flavor you're getting.
It's similar to German Buttercream frosting which is the holy grail of frostings in Croatia, but much easier and again - doesn't require eggs to make a custard, which then gives you a delicious, but yellow frosting.
On my quest to find the best less sweet buttercream frosting - more than three years ago - I'd discovered a blog called The Tough Cookie. I'll forever be grateful to Nila for introducing me to this wonderful frosting, which had some of my cake testers confused for whipped cream+mascarpone frosting. Yes, it's that light! 🙂
Since my first encounter with Nila's base recipe, I adapted it to suit my needs and preferences, but also made a lot of different flavors, such as chocolate ermine buttercream, raspberry buttercream and pistachio buttercream. There are more to come in the cake cookbook I'm currently writing, so stay tuned! 🙂
Why you'll love this frosting
- It's egg free.
- It has the perfect balance of sweetness - no more sacrificing flavour to get the consistency right.
- Doesn't form a crust.
- It's easy to whip up, you don't have to pay attention to reaching certain temperatures.
- It colours and pipes beautifully.
Ingredients
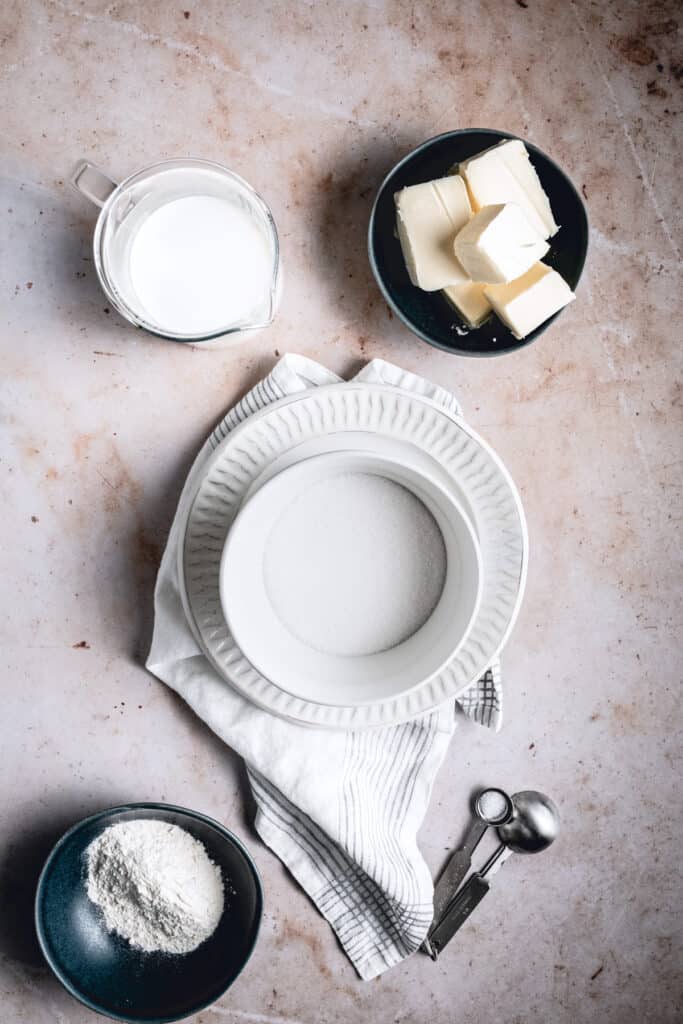
- All-purpose flour
- Caster sugar (granulated works, too)
- Whole milk
- Salt
- Butter
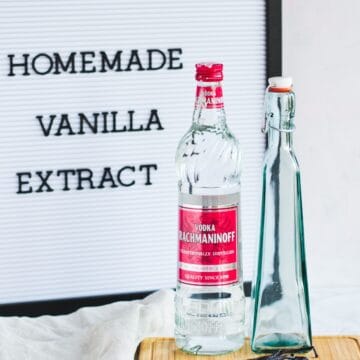
- *Vanilla (or other flavourings)
How to make ermine frosting (step-by-step)

1 2

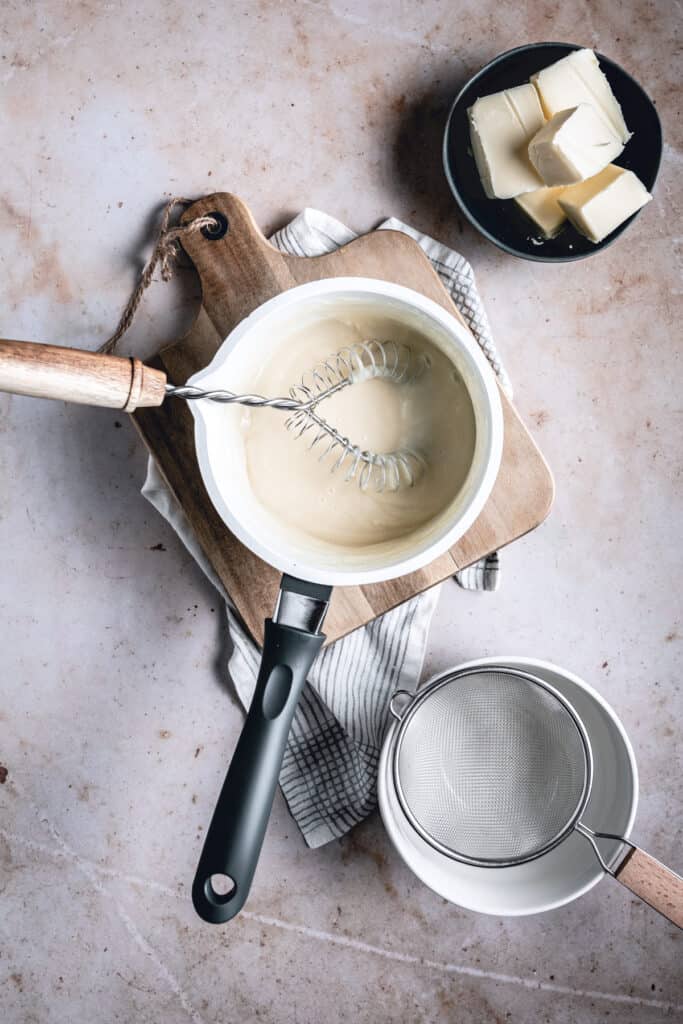
- In a small heavy-bottom saucepan whisk together the flour, sugar and salt. Add the whole milk and whisk until everything is combined or until there are no lumps, or flour floating arount (like shown in the image).
- Cook the mixture on a medium-high heat, whisking constantly so it doesn't catch on the bottom. Some prefer using a silicone spatula, but I get better results with no lumps using a whisk. The cooking is done when the mixture thickens quite a bit and bubbles appear on the surface, just like when making a pastry cream. From that moment on, cook for another 2-3 minutes to get rid of possible flour aftertaste and you're done.
(3) (3) (3)
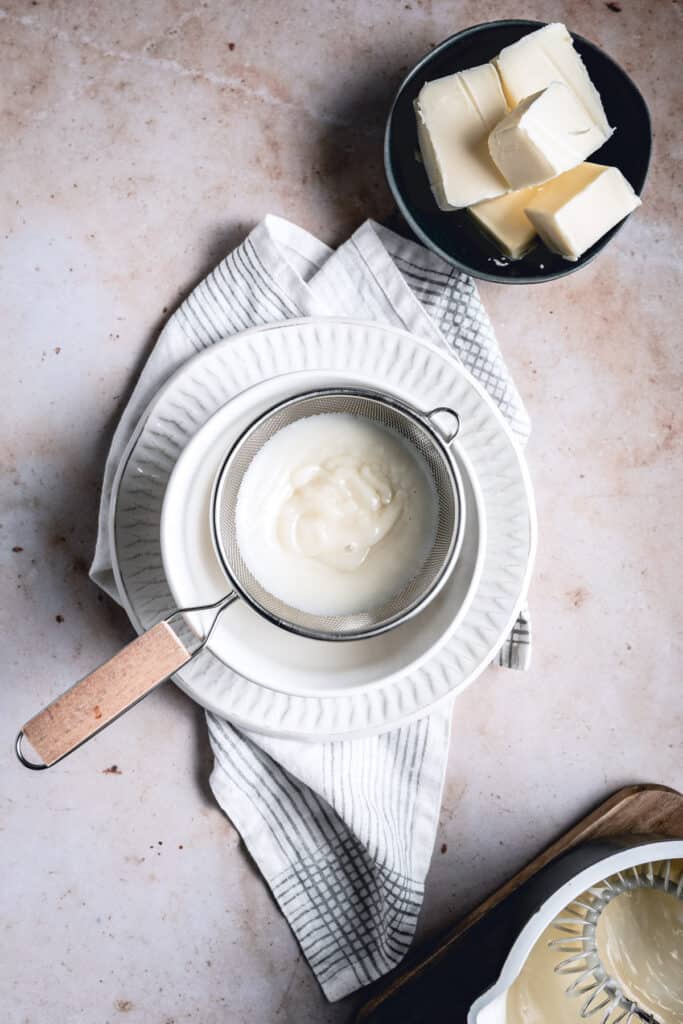
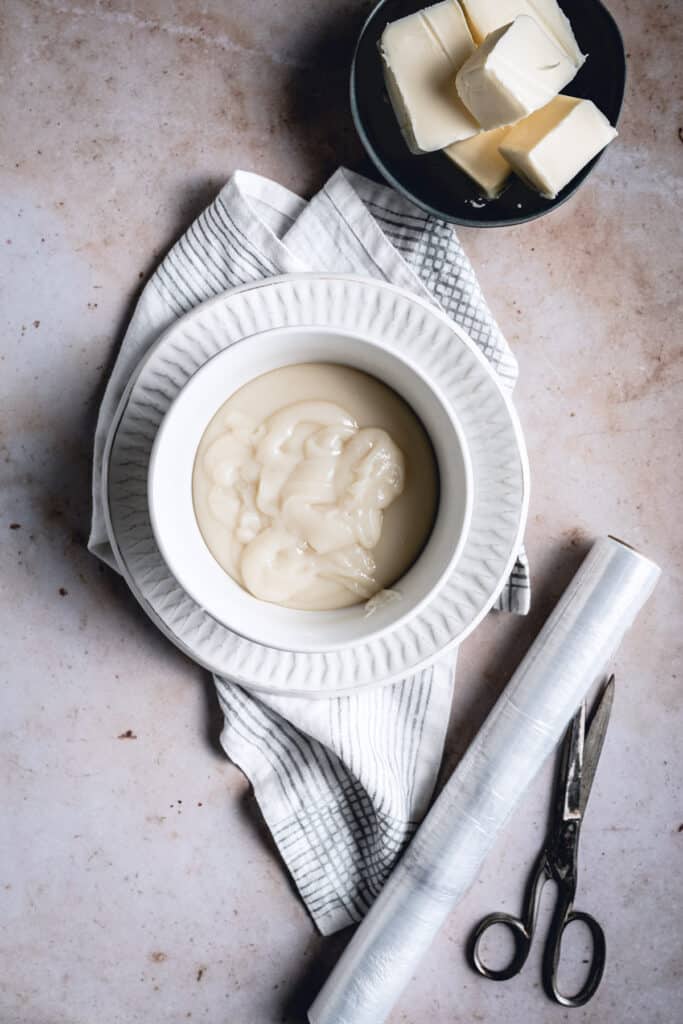
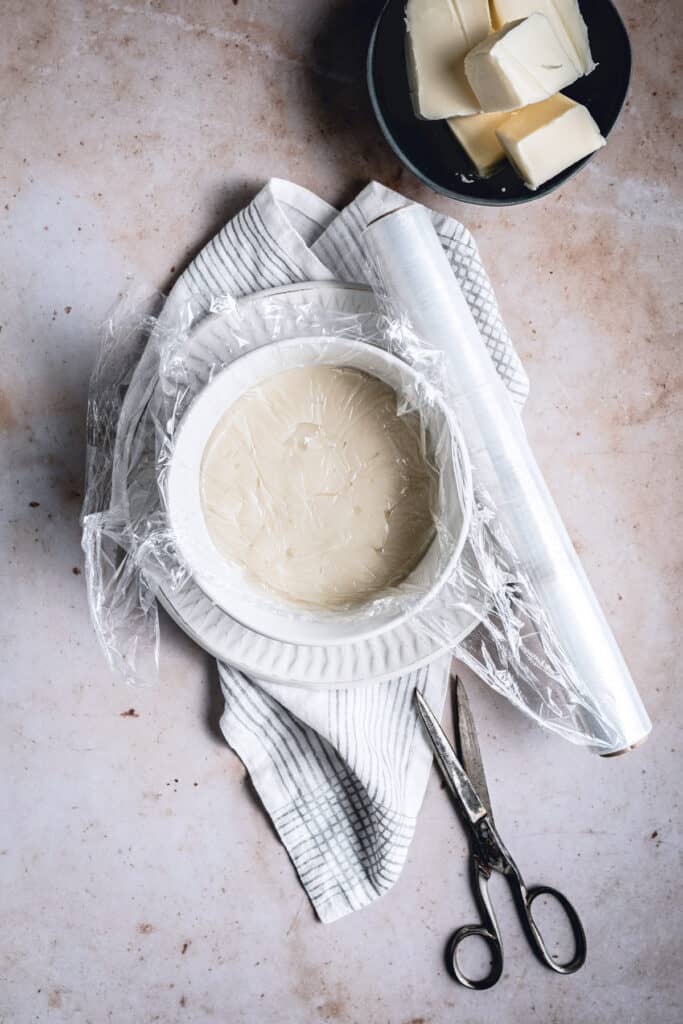
3. Strain the pudding base through a fine-mesh sieve to make sure there are no lumps and you get a smooth texture. If you want it to cool quicker, use a larger, shallow plate. Cover with cling film touching the surface to prevent skin forming and leave to cool at room temperature.
You can let it cool in the fridge if you're in a hurry, but please make sure it's room temperature before mixing it up with butter.
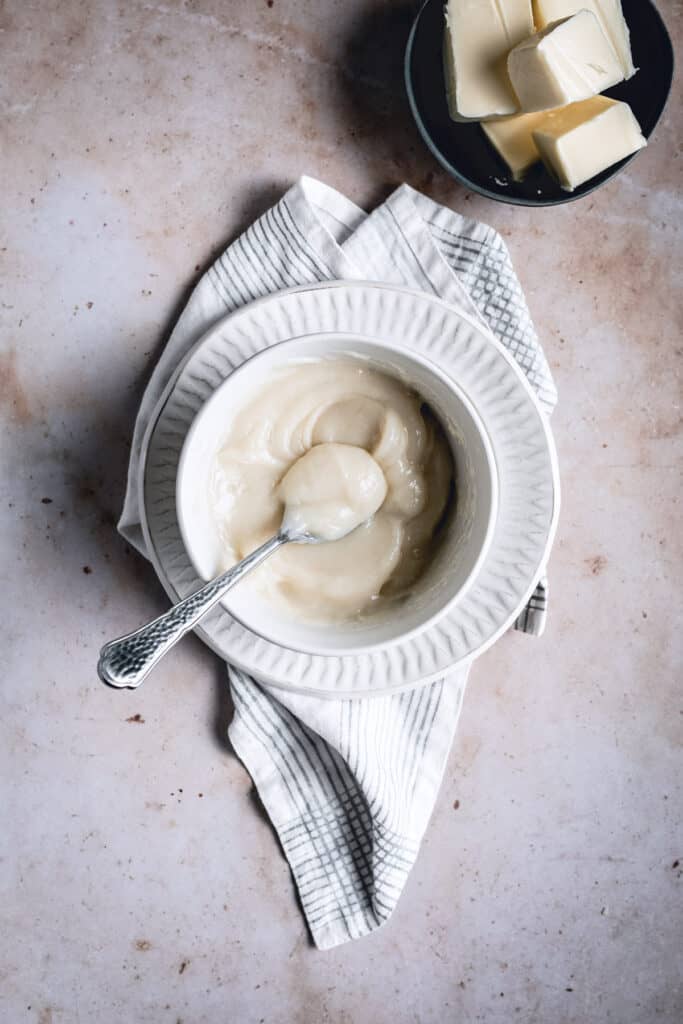
4. After your pudding base is cooled and ready, give it a stir with a silicone spatula or a spoon before incorporating it with butter. This is how your pudding base should look like when it's ready.
(5) (5)
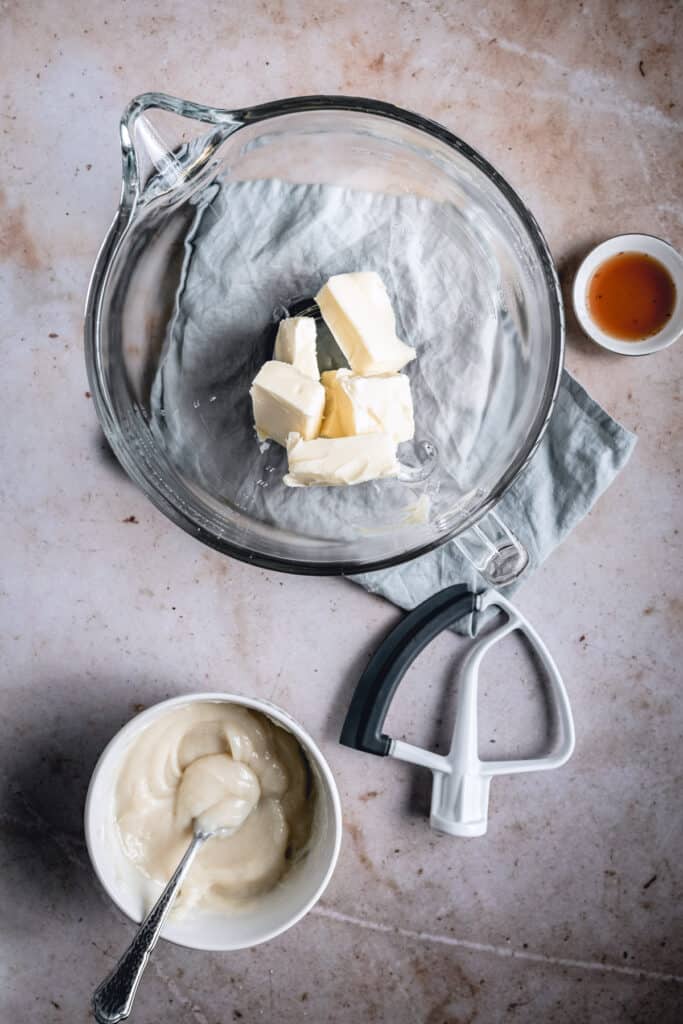
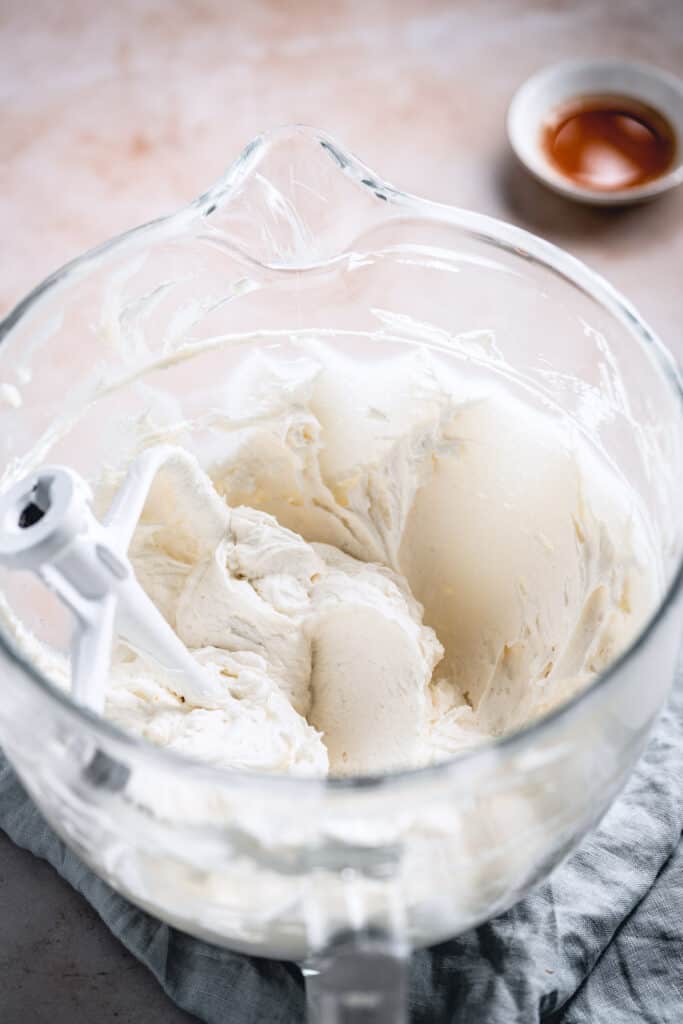
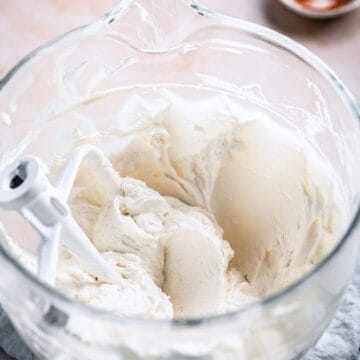
5. In a bowl of a stand mixer (or using an electric hand mixer), beat the butter for at least five minutes, until it becomes really pale (almost white) and fluffy.
6 6
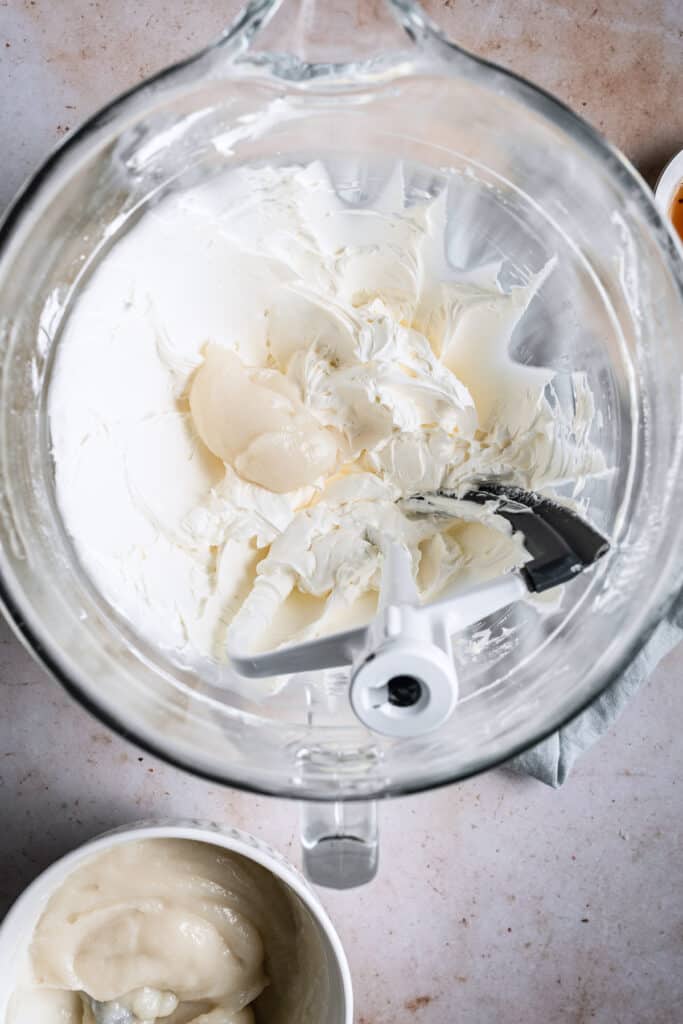
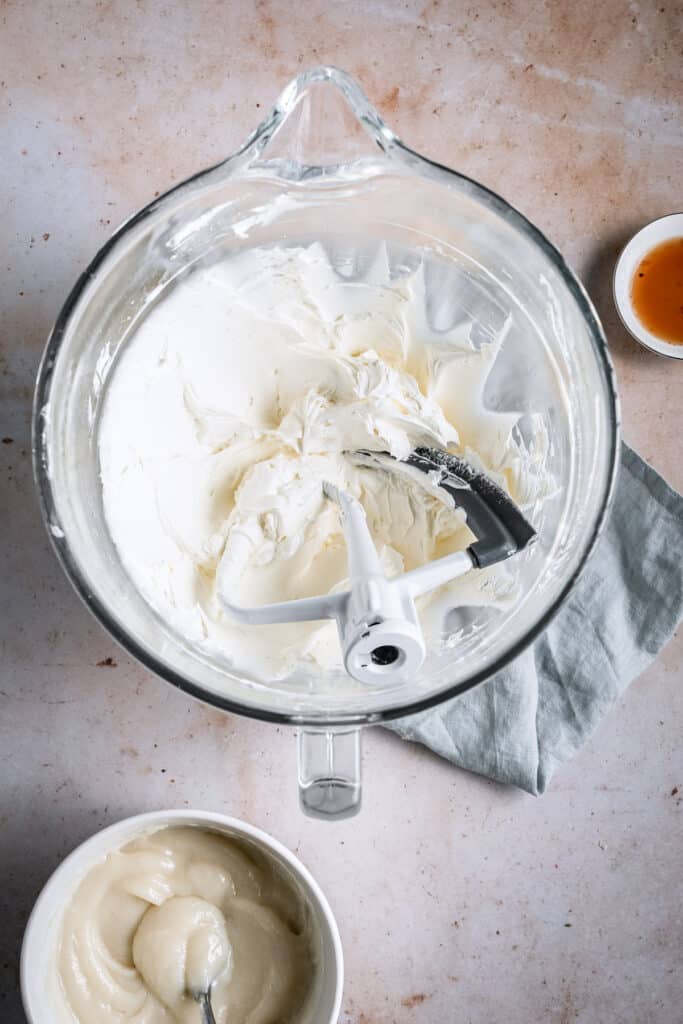
6. While the mixer is still running on a medium speed, add one tablespoon at the time of the pudding mixture, making sure it's nicely incorporated with the butter before proceeding to add another one.
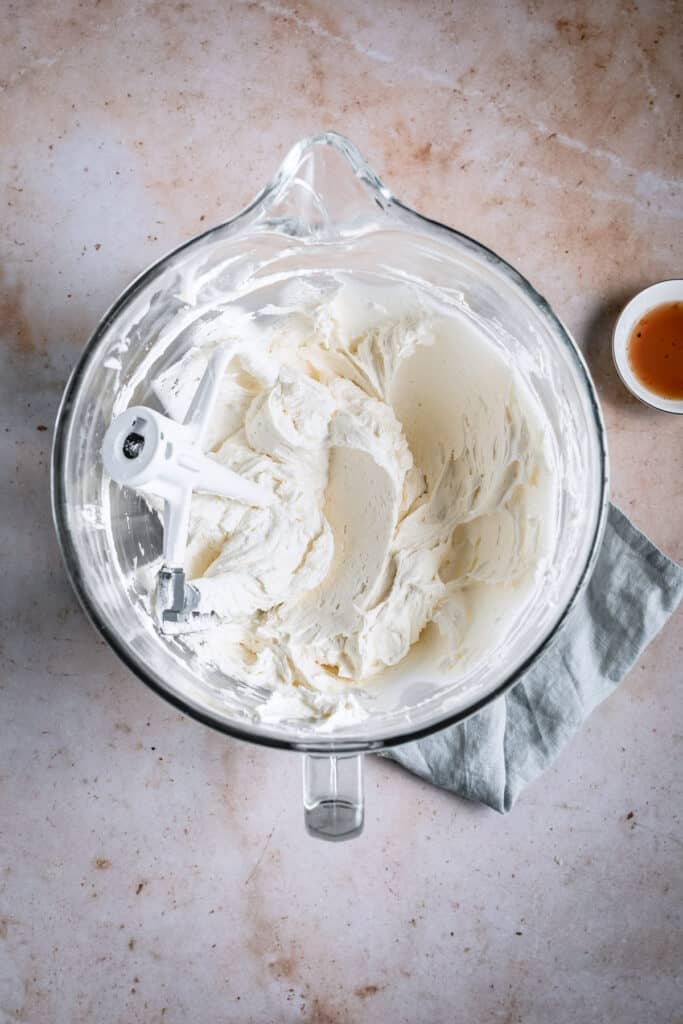
Once you've added all of the pudding, beat on medium-high speed and scrape the bottom of the bowl once or twice to make sure everything is combined. Add in the vanilla and give it mix one last time.
That's it! You got yourself a delicious, fluffy, vanilla flour buttercream! 🙂
My top tips for success every time
- Beat the butter for full 5 minutes, even longer if you're making a double batch. I know it seems a lot and your hands might hurt if you're using an electric hand mixer - but it will make all the difference in getting that light and WHITE frosting.
Scrape the bowl with a silicone spatula every now and then to ensure every bit of butter is thoroughly beaten.
- Make the pudding base the night before the day you plan to complete the frosting and assemble the cake, so you don't end up panicking if it doesn't cool quick enough. Time management is everything. 😉
- If you need to make a lot of frosting, I'd rather make one or double batch at the time , just because it's easier for the mixer and you won't risk messing up the ratios.
When I'm making a three-layer 6-inch cake and want to have enough buttercream to generously fill, frost and do various decorations (different colors etc.), I'll make a batch using 300 or 350g of butter. I'd rather have some leftover than not enough.
Just move the serving slider until you see that number and it automatically calculates the rest. 🙂

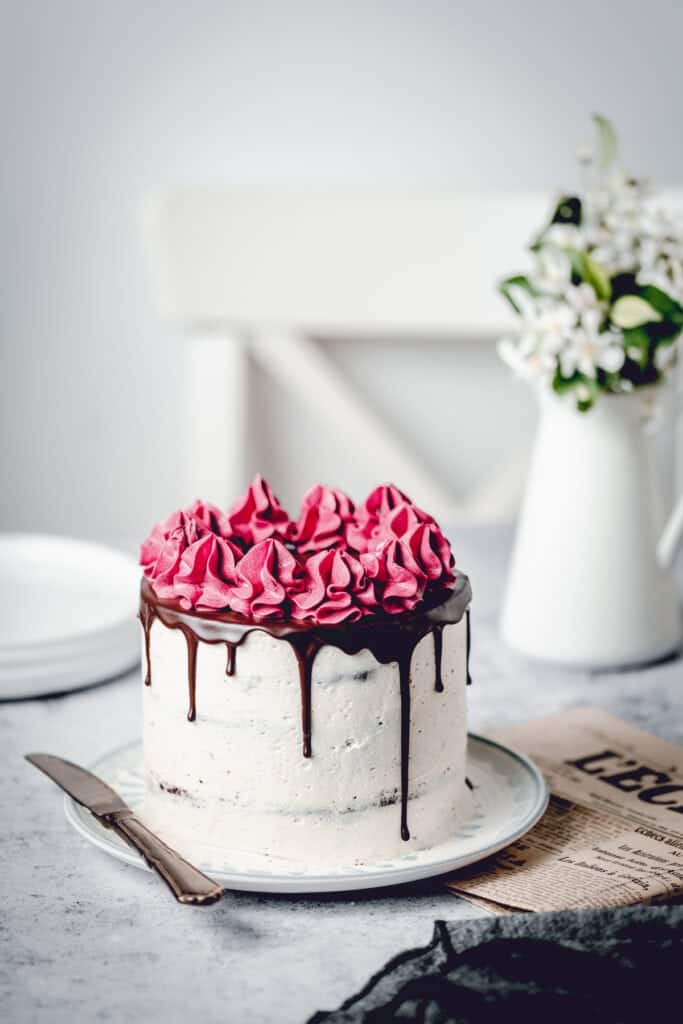
Some of my favourite recipes that use ermine frosting
Dulce de Leche Banana Cake
Funfetti Birthday Cake
Raspberry Vanilla Cake
Chocolate Berry Layer Cake
FAQ + Troubleshooting
Most likely one of your ingredients was too cold, either the pudding base or the butter. Not to worry, all you have to do is heat it up a little bit - I usually use a hairdryer outside of the bowl. Do it one bit at a time, so you don't melt the butter and keep whipping it until it comes together.
Two situations might have occurred.
1. It's just too hot, so your ingredients were softer/hotter than needed. Whack the bowl in the fridge for 20-30 minutes and check again.
2. You tampered with measurements and possibly added more milk/sugar, which leaves you with a softer pudding base and ultimately softer buttercream.
You sure can, but adding more sugar will make the pudding base looser (and a softer buttercream), so you need to add some more flour too, to keep the consistency right.
1. Are you sure you measured everything correctly?
2. You probably didn't cook it long enough. Although I always try to explain the process the best I can, the things you end up doing are beyond my comprehension. Maybe your hob runs colder than mine. Maybe you've used a different pan that needs more time to heat up.
Yes, you can. I've made the vegan version successfully using soy and rice milk. I've also tried using oat milk, but it leaves too much of an aftertaste. I suggest you use the one you like the taste of or the one that has the least noticeable taste. Plant-based kinds of milk are usually more watery than regular cow milk, so it's important to use more flour in order to get the same thickness of the pudding base, that is - roux.
This is also one of the most common questions I get asked by experienced home cake bakers. I don't use fondant, nor have I ever used it, so I can't speak from personal experience. That said, from what I've gathered, I don't see why not. Like every other buttercream, it firms up in the fridge because of the butter solidifying, so it can hold up fondant very well without collapsing.
You can, just make sure to bring it up to room temperature ( around 21˚C/70˚F) and then whip it up to bring back the fluffiness. However, if possible, make it fresh on the day of stacking the cake, because refrigerating might make it lose some of its volume.
That said, I've tested on multiple occasions leaving the buttercream in a bowl at room temperature overnight (tightly covered with plastic wrap) and didn't have any issues.
Custard-based desserts usually don't freeze well. I have never tried to freeze leftover ermine frosting, but since it has a milk base, I suspect it would split and curdle once thawed. However, I did manage to successfully freeze individual cake slices that were filled and coated in ermine buttercream.
I would assume that larger batches wouldn't do well with freezing and thawing.
If you have any other questions that I didn't cover, please let me know in the comments section down below - I'd love to help you out! And if you make this recipe, tag me on Instagram @anasbakingchronicles so I can see it or feel free to e-mail me your pictures and thoughts! I love seeing your bakes!
Happy baking,
Ana
📖 Recipe
Ermine Buttercream Frosting (Flour Buttercream)
Description
ingredients
Vanilla buttercream
- 35 g all-purpose flour
- 160 g white caster sugar
- ¼ teaspoon salt
- 280 g whole milk
- 250 g unsalted butter (room temperature)
- 2 teaspoons vanilla extract
Instructions
- In a small saucepan (I always use heavy-bottomed one to prevent burning) combine flour, sugar, salt and milk. Cook over medium-high heat, stirring constantly with a whisk until it thickens and bubbles appear on the surface. This can take about 15 minutes.
- Once it's done, strain it through a fine mesh sieve into a shallow plate to get rid of any lumps. Put a cling film over it touching the surface to prevent "skin" forming and let it cool to room temperature. This is your pudding base. You can do this in a fridge, but before using it let it come to room temperature.
- Using a stand mixer fitted with the paddle attachment, beat the butter for at least 5 minutes until it's pale and fluffy. Then add spoonful by spoonful of previously made pudding. Mix until it's all nicely incorporated and with no lumps. Add vanilla extract and mix until everything is combined.
Notes
- If you don't have a stand mixer, you can use a hand mixer.
- If you still don't own one, I advise you to buy a kitchen scale - they're cheap and easy to use, and always guarantee the same results in baking!
- Originally published: June 14, 2020
IMPORTANT
All the recipes are developed and tested using only metric measurements and a kitchen scale. The U.S. cup and spoon measurements are provided for your convenience, but I highly recommend getting a digital kitchen scale and measuring in metrics. It's easy and always guarantee the same results in baking!
Nutrition
The nutritional information and US conversions are calculated automatically. I cannot guarantee the accuracy of this data. If this is important to you, please verify with your favourite nutrition calculator and/or unit conversion tool.
Ann Taylor McLeod says
I am very familiar with this frosting as my mother always used it on her red velvet cake. She described it as tasting like whipped cream. This is my favorite cake! I have pictures, on my 5th birthday, blowing out the candles on my red velvet cake (I'm now 62). My mother made the pudding using a double boiler, and that is how I make it. My frosting is perfect every time. Thank you for introducing this delicious frost to bakers of today!
Ana Zelić says
Dear Ann,
thank you so much for sharing your memories and story, it was a delight to hear them. I will surely try and make the pudding using a double boiler to see if it makes the frosting even better than it is now. Thank you for sharing this with me!
Hope you have a lovely day x
Deb says
This is beautifully light and tastes a lot like whipped cream. How long can it safely sit at room temp? Thanks so much for this wonderful recipe!
Ana Zelić says
Hi, Deb! I'm happy you like it and think so, it's my favorite frosting! 🙂
If you're asking for just completed buttercream, before the assembly, I've let it a whole day one day, because something went wrong in the kitchen, so I couldn't assemble the cake on time. If you're asking for the assembled cake, it can be at room temperature for 2 days, maybe 3 if it's not too hot and if the buttercream was freshly made when the cake was assembled.
However, if you want to be on the safe side, I suggest keeping the cake in the fridge, but letting it come to room temperature completely before serving. Ideally 2-3 hours for a fully assembled cake.
Does this help you? x
Cherie says
Hello ana 🙂 I am so so happy that i have tried your ermine frosting from your oreo cake recipe. I have always hated the sickeningly sweet american buttercream but also found that swiss meringue cream is a little lackluster (mostly taste like butter) 🙁 So I have always been on the hunt for the perfect balance, and chanced upon your ermine frosting on this website! Tried it once and it was a success! It was so easy to work with, especially with Singapore's hot weather :") I have always tried a multiple recipes from you and they work wonders! I just wanted to say keep doing what you are doing and keep those recipes coming, I love them!
Jav says
Hi Ana,
Thank you for your detailed instructions and photographs- really helps for new bakers like me! I'm thinking of making a tangy lemony frosting; do you think it will work if I replace maybe 5 tablespoons of milk with lemon juice, and cook it over the stove with the dry ingredients?
Cheers! (:
Ana Zelić says
Hi Jav,
so happy you enjoy the detailed explanation. 🙂
For lemon frosting, I would add freshly grated lemon zest at the very end, instead of vanilla extract. You can also add a couple of tablespoons of lemon curd. If you add the lemon juice to the milk mixture, the acidity from the lemon will curdle the milk and you will end up with split, curdled, cheesy mixture.
Usually, the oils released from the lemon zest (make sure to grate directly over the bowl) are enough to bring out the lemon flavor.
Hope this helps! x
trish says
Can you frost the cake a day ahead with this frosting?
Ana Zelić says
Yes, absolutely! If it's not too hot, the cake will hold good at room temperature, but I always place it in the fridge to chill, especially if I need to take it from one place to another.
Ada says
Hi
This is a wonderful recipe not too sweet.
I made it two weeks ahead and froze it, but when the time came to thaw and frost, it was curdled and no matter how much I beat it again it would not recover its original texture so I had to make a fresh one.
Is there any trick or it is simply that this cannot be frozen?
I will appreciate any comment.
Thank you very much.
Ana Zelić says
Hi Ada!
This buttercream doesn't freeze well because it's milk-based, it has more water content in it than other buttercreams that are mostly fat and sugar. That's why your buttercream has split and curdled once you thawed it.
I'm so sorry that you experienced this, but thank you so much for your feedback because I've added this information in the post for other people who try to freeze this frosting.
Hope you have a nice day! x
Helen says
Your recipe is fantastic and works every time. I would never go back to making Swiss Meringue Buttercream again because the flavour of this one is so much better. Thanks for making it available. One question, is 250 grams of milk correct or would it be 250ml? I’ve tried both, I don’t think it makes much difference but I like to be accurate. Also, I’ve found it lasts a long while in the fridge and also frozen. We have very hot humid summers here and it stands up pretty well. SMBC is so fragile by comparison. I made my daughter’s wedding cake a couple of months ago and this icing was used for that too, it holds it shape beautifully. Couldn’t be happier with it! 😊